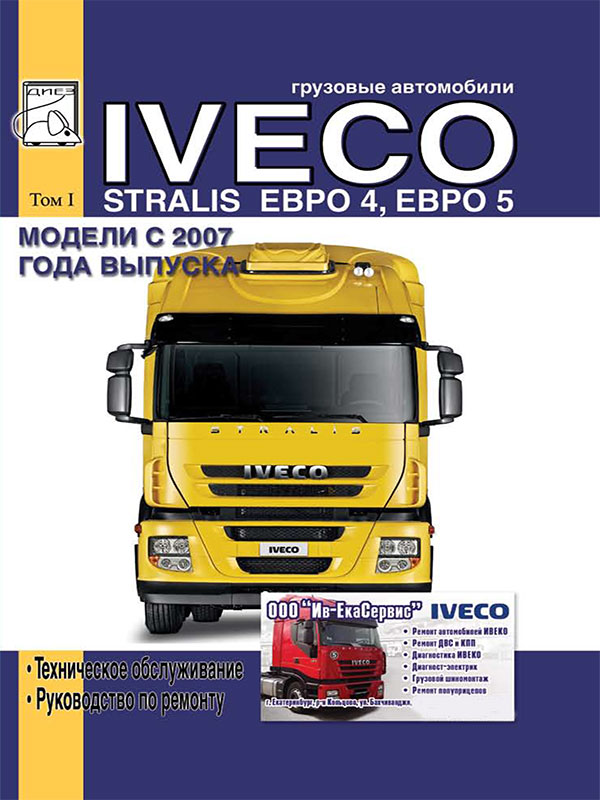
 Iveco Stralis since 2007, service e-manual (in Russian), volume 1
Автор: Диез
Год издания: 0000
Content
General information
Vehicle identification
Models complete set
Decryption
Lubricants
F2B engine
F3A engine
Switch boxes (volume filled during the first filling)
Hub (one)
Rear axle
F2B Engines
Engine identification
Specifications
Options
Specifications
Cylinder block and crank mechanism
Crankshaft
Valve actuator
Cylinder head
Tightening torques for screw connections
Powertrain
Removing and installing engine
Withdrawal
Installation
Filling the cooling system
Preliminary operations
Filling the system
Removing air from the cooling system
Removing air from the power supply system
Replacing the magnetic fan clutch
Withdrawal
Installation
Dismantling the engine at the stand
Cylinder block
Checks and measurements
Replacing the cylinder liner
Withdrawal
Install and check protrusion
Crankshaft
Crankshaft journal measurements
Preliminary determination of the size group of the liners of the main and connecting rod bearings of the crankshaft
Selection of main and connecting rod bearing shells
Determination of the size group of the diameter of the main and connecting rod journals (journals of nominal diameter)
Selection of main bearing shells (ground journals)
Selection of main bearing shells (nominal diameter journals)
Selection of bearing shells of the lower connecting rod head (journal of nominal diameter)
Selection of the bearing shells of the lower end of the connecting rod (ground journals)
Replacing the timing gear and oil pump
Checking the crankshaft end play
Checking installation clearances
Piston
Disassembly
Piston rings
Connecting rod
Crankset marking scheme
Alignment check
Curl check
Bending test
Installing piston rings
Installing the piston and connecting rod assembly into the sleeve
Checking the connecting rod journal clearance
Cylinder head
Removing valves
Checking the bottom plane of the cylinder head
Valves
Removing carbon deposits and checking valves
Valve guides and seats
Replacing the valve guides
Replacing valve seats
Replacing the injector sleeves
Gas distribution mechanism
Replacing bushings
Camshaft
Camshaft bushings
Valve Springs
Installing valves and valve stem seals
Bal rocker arms
Assembling the engine at the stand
Adjusting the timing
Valve clearance adjustment
Adjusting the preload of the injector rocker arms
Lubrication system
Oil pump
Heat exchanger
Oil filter
Valve in the piston coolant sprayer
Cooling system
Pressurization system
Functional principle of the VGT turbocharger
Actuator (drive)
Power system
Fuel pump
Injector
Replacing injectors
Phases of injector operation
F3A Engines
Engine designation
Specifications
Parameters, F3A engine
Specifications
Cylinder block and crank mechanism
Crankshaft
Valve actuator
Cylinder head
Tightening torques for screw connections
Removing and installing engine
Withdrawal
Installation
Filling the cooling system
Removing air from the power supply system
Replacing the magnetic fan clutch
Withdrawal
Installation
Dismantling the engine at the stand
Cylinder block
Checks and measurements
Replacing cylinder liners
Crankshaft
Crankshaft journal measurements
Selection of main and connecting rod bearing shells
Replacing the timing gear and oil pump
Checking installation clearances
Checking the crankshaft end play
Piston
Piston rings
Connecting rod
Crankset marking scheme
Connecting rod bush
Valves
Valve guides and seats
Replacing the injector sleeves
Gas distribution mechanism
Camshaft
Camshaft bushings
Valve springs
Rocker shaft
Assembling the engine at the stand
Lubrication system
Cooling system
Electromagnetic fan clutch
Pressurization system
Power System
HIDROCAR power take-off on the gas distribution mechanism (option)
Removal / Installation
DENOX emission control system
Repair
Diagnostics
Diagnostic devices
Description of fault codes
Clutch
Specifications, 17 "clutch for E2B / FZA engines
Specifications, clutch 17 "for F2B engines with gearbox 9S 1310 TO / 9S 1311 TO 129
Troubleshooting
Tightening torques for screw connections
Clutch removal and installation
Replacing the clutch release bearing
Replacing the clutch shaft support bearing
Removing and installing SATA pedal unit
Checking and adjusting the clutch pedal travel stops (vehicles with ABS)
WABCO pedal (vehicles with EBS)
Clutch pedal travel stop bolt
Clutch pedal free play
Pedal Control Valve Stroke
Hydraulic steering (vehicles with ABS)
Clutch Actuator (without friction lining wear indicator)
Specifications (manual transmission)
Pusher (rod) length adjustment
Bleeding the clutch system
Specifications (automatic transmission)
Adjusting the length of the slave cylinder pusher (new clutch)
Installing the slave cylinder
Replacing the slave cylinder
Gearboxes
Gearbox ZF 9 S 1310 TO
Specifications
Gearbox ZF 16 S 1620Т.D .; ZF 16 S 1920 T.D ;; ZF 16 S 2220 T.D. / T.O.
Specifications
Tightening torques for screw connections
Removal and installation
Gearbox ZF 16 S1621TD; ZF 16 S1921TD; ZF 16 S 2221 TO. / TO
Removing the intarder
Removing the rear case of the planetary gear unit
Removing the planetary gear assembly
Installing the planetary gear unit
gearbox EUROTRONIC 12 AS 1420 TD.
Specifications
Gearbox EUROTRONIC AUTOMATED 12 AS 1930 TD. 12 AS 2330 TD. / TO
Specifications
Gearbox removal and installation
Gearbox EUROTRONIC AUTOMATED 12 AS 1931 TD. 12 AS 2331 TD. / TO
Removing and installing intarder
Determining the thickness of the bearing shim
Determining the thickness of the stator adjusting ring
Removing the rear of the gearbox housing
Disassembly of the planetary gear
Planetary gear assembly
ALLISON 3200 gearbox
Specifications
Tightening torques for screw connections
Troubleshooting
Removal and installation
Diagnostics of the ELECTRONIC gearbox
Fault codes
Hydraulic retarder (intarder)
General information
How it works
Removing and installing retarder, gearbox ZF 16 S 1920/2220
Withdrawal
Installation
Oil filling
Specifications
Tightening torques for screw connections
Troubleshooting
Retarder repair
Removing the accumulator
Installing the accumulator
Dismantling the retarder
Checking the technical condition of the retarder parts
Retarder assembly
Cardan shafts
Specifications
Troubleshooting
Removing and installing propeller shaft
Checking the propeller shaft on the vehicle
Disassembly and assembly of universal joints
Disassembly and assembly of the support
Rear axle
Troubleshooting
faults
Removing and installing rear axle
Removing and installing differential from the rear axle (without removing the axle from the car)
Rear axle ARVIN MERITOR MS 13-175 205 Specifications
Wheel hub repair
Differential removal and installation
Differential repair
Dismantling the differential box
Removing the drive bevel gear from the support
Checking differential components
Determining the thickness of the stator shim
Differential box assembly
Installing the pinion pinion support
Differential housing assembly
Adjusting the distance between the covers
Correction of the contact patch of the final drive gears
Replacing the pinion support oil seal
Rear axle 451391/1
Specifications
Repair
Differential removal and installation
Differential repair
Tandem rear axle ARVIN MERITOR MT23-155 / D
Specifications
Wheel hub repair
Center differential
Removing and installing axle differential
Output shaft removal and installation
Rear axle ARVIN MERITOR MR11-155 / D
Specifications
Front axle
Front axles 5876/4; 5876/5; 5886/5 and and steered additional front axle 5876/4
Specifications
Troubleshooting
Front axle removal and installation
Additional steering axle (6x2 vehicles)
Filling and bleeding hydraulic circuits
Loop 1
Loop 2
Additional lifting steerable axle, 6x2 vehicles
Checking the ball joint play of the steering link
Front axle repair
Removing and installing hubs
Tie rod removal and installation
Replacing the tie rod ball joints
Removing and installing steering knuckle pivot
Additional rear axle 55080 / D1
Specifications
Removal and installation
Repair
Optional lift rear axle 56082 / D1 with hydraulic raise / lower
Specifications
Removal and installation
Repair
Wheel alignment angles
Optional steered rear axle 57080 / D 1 with pneumatic lift / lower
Specifications
Repair
Hydraulic steering axle steering
Checking nitrogen pressure and charging the hydraulic accumulator
Slave cylinder
Centering cylinder
Bleeding hydraulic system
Air suspension and pneumatic axle lift system
Troubleshooting
Tightening torques of threaded joints of parts of the steering mechanism and the device for raising and lowering
Removal and installation of raising and lowering an additional steering axle
Wheel alignment angles
Steering
Specifications
Removing and installing power steering
Steering arm removal and installation
Removing and installing steering column assembly
Replacing the pneumatic cylinder
Bleeding the power steering circuit
Measuring steering play with the steering wheel
Checking the maximum pressure in the power steering
Troubleshooting
Wheels and tires
Troubleshooting
Static wheel balancing
Tire pressure
Cab and frame
Specifications
Repair
Maintenance
Cars with CURSOR 8 (F2B) engine
Maintenance Descriptions
Cars with CURSOR 10 (F3A) engine
Maintenance Descriptions
Abbreviations
 Pontiac Fiero (1984-1988 гг.) Haynes Manual
Автор: Mike Stabblefield
Год издания:
Руководство Haynes по обслуживанию и ремонту автомобиля Pontiac Fiero (1984-1988 гг.).
 Daewoo Sens Service Manual
Автор: Николаенко Владимир Анатольевич
Год издания:
В данной книге на хорошем инженерном уровне, но в то же время просто и доступно, описаны модели ZAZ-DAEWOO SENS, с 2002 г. выпуска, торговое обозначение: T1311-01, T1311-02. Бензиновый двигатель с системой распределенного впрыска топлива:1. 3 л. - 51.
 Translation Techniques. English - Russian. Практические основы перевода
Автор: Т. А. Казакова
Год издания:
Учебное пособие предназначается изучающим английский язык и входит в систему предметов, обучающих теории и практике перевода. Материал пособия направлен на освоение и развитие практических навыков перевода с английского языка на русский и наоборот.Основным принципом построения пособия, отбора и расположения учебного материала является создание систематического представления о способах, средствах и приемах преобразования языковых единиц в процессе двустороннего перевода. Пособие может бытьиспользовано в рамках учебного процесса на факультетах иностранных языков, для обучения переводчиков, а также для самостоятельных занятий студентов, аспирантов, преподавателей английского языка и начинающих переводчиков.
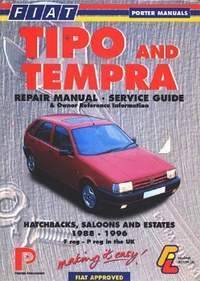
 Fiat Tipo and Tempra 1988-1996. Repair Manual – service guide
Автор: Коллектив авторов
Год издания:
Инструкция по ремонту и обслуживанию моделей Fiat Tipo и Tempra. Дано описание всех узлов и агрегатов и советы по их эксплуатации и техобслуживанию. Чертежи, таблицы и схемы электрооборудования.
Fiat Tipo - автомобиль итальянской компании Фиат. Был разработан дизайн студией IDEA. Выпускался с 1988 года по 1996 год.
 Italiano in cinque minuti. Volume 1.
Автор: Galasso Sabrina, Trama Giuliana
Год издания:
Грамматические и лексические упражнения по итальянскому языку.